2/03/2016 – Update:
So this is crazy! I have been getting so many views of this post coming over from Pinterest! Thank you for coming by and for all the good you are doing for your friends, family, strangers – or maybe even for yourself. Hugs all around!
With so much traffic to this blog post, I’ve decided to update a couple of things – some thanks to the suggestions of readers. So – anything you see in this color is an addition or change to the original post.
And just so you know – I had a CT scan recently and there was no visible sign of cancer. I’ll be celebrating my 2nd birthday (stem cell transplant anniversary) on 2/12.

Enough hair for a little trim!
I’ve been neglecting this space again! Jana Last even included my last post – Mom’s recipe for Blender Custard Pie – in her Fab Finds. A week ago! I didn’t realize it until today.
I usually post family recipes on Friday, but today will be a different kind of recipe. Not really a recipe – I’m fudging cheating. It’s a pattern.
If you are a frequent visitor, you know that I had a stem cell transplant on February 12th – my new birthday. That makes me 7 months old today!
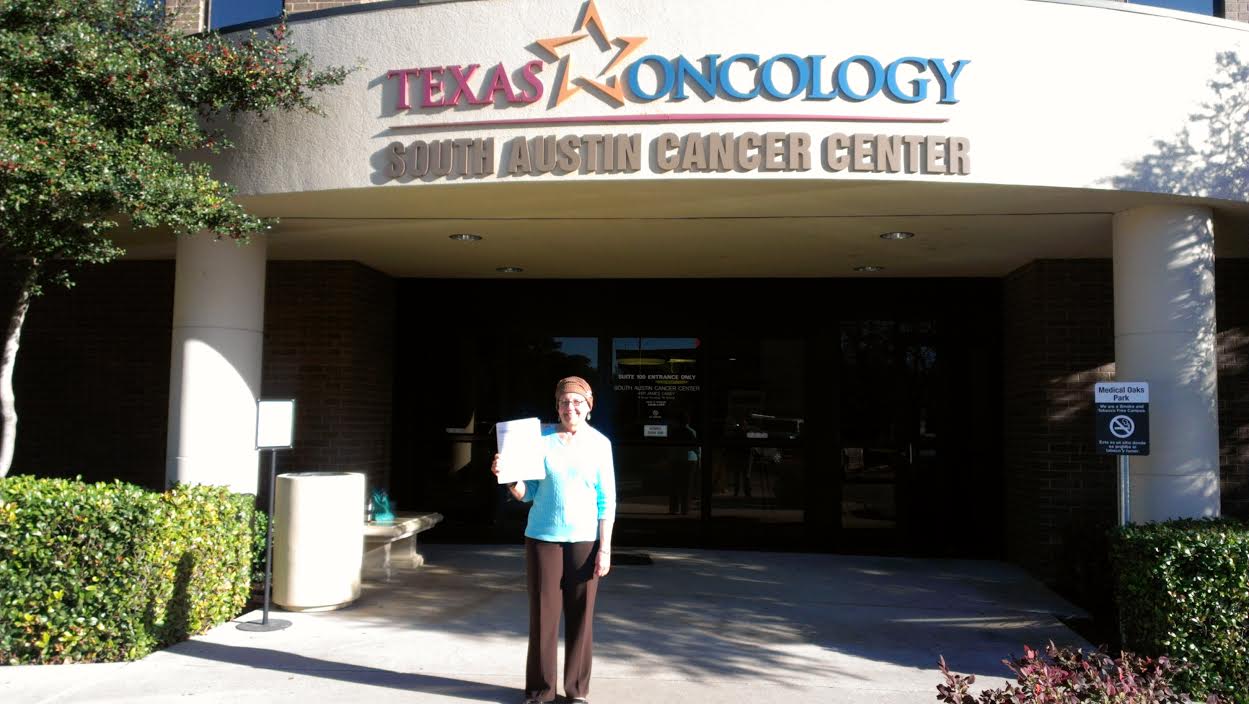
On August 12, my six month new birthday, I celebrated by taking snacks and portacath pillows to the infusion (chemo) room where I received six rounds of chemo from Sept.- Dec.
On my first day of chemo I was scared and apprehensive. A friend texted me after a couple of hours and asked how it was going.
My answer to her: It is strangely pleasant here.
Cancer free! 12/13
And it was. My nurse, Emily, took such good care of me, patiently explaining everything and making sure that I was comfortable. The woman across from me had a friend with her and they were playing cards and laughing. They wanted a picture taken with Emily, so I suggested my husband take it. 🙂 There was a volunteer in the room who came around every so often and offered to get water, coffee, or a snack for my husband and me. It was so nice to be looked out for in that way.
Hours spent in the chemo room were mostly pleasant and I always had wonderful nurses and the best of care. But there was never a volunteer with snacks on any of the other days. 🙁
Now that I am able to be on the giving side of cancer, I decided that, once I felt up to it, I would spend some time in the infusion room and try to return just a bit of the goodness that I had received there. I’m not up for doing this on a regular basis, but I decided that I could do something once a month to celebrate on the anniversaries of my transplant.
Now let me tell you about those pillows, as they are the main point of this post….
In the infusion room, there was a basket that held hats that had been sewn or knitted or crocheted by volunteers and were free for the taking. Friends who had been cancer patients told me to look for the basket and to find a hat to wear to bed because my head would get cold at night. (They were right!) I found a hat I sort of liked …. (I’m not much for turban-style pink hats that scream CANCER), but it was just the right weight – not too heavy and thick – a nice, soft fabric for a sleeping cap.
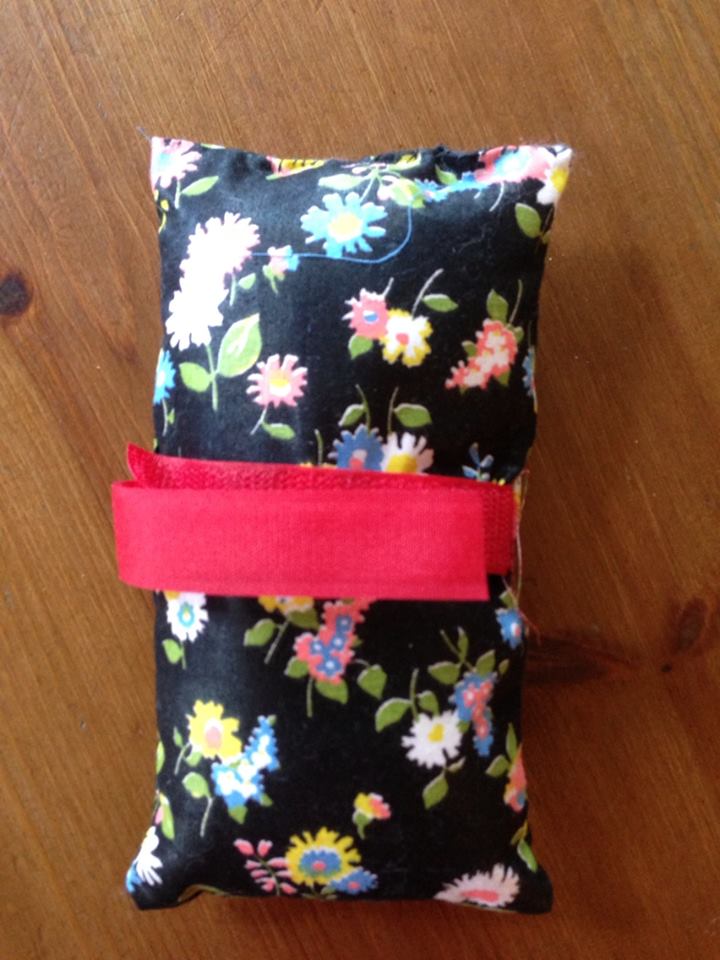
my pillow
The other thing I found in the basket – and there was only one – was a portacath pillow. There was a note with it saying that it had been made by a woman in her 80s who is a cancer survivor and her daughter is a cancer survivor. It even had her address so I could send her a note of thanks. 🙂
Many cancer patients have a power port or a portacath “installed” under the skin a couple of inches below the collar bone. You know – right where a seat belt will fit perfectly over it, pressing firmly to make it just a bit uncomfortable. This great little pillow attaches to your seatbelt and holds it off of your port. I prefer to have the pillow higher than my port as I find that if it is right over the port it still puts pressure on it.
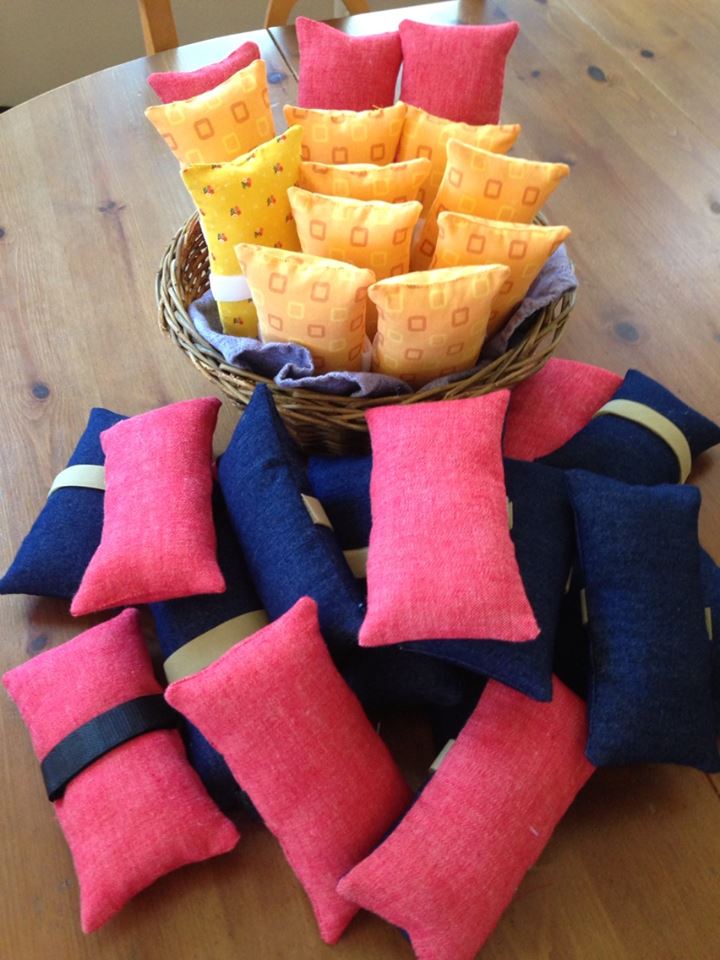 I used the pillow I took from the basket as my pattern and made 31 for the infusion room last month. There were none in the basket today. Time to make more! I’m sharing my directions with you, in case you would like to join me.
A friend helped me pick out the gold fabric off the discount table at the fabric store, noting that is is gender neutral. What smart friends I have! I made some from denim I had on hand, but they take longer to make because of the little bit of hand sewing. It’s dense and hard to poke a needle through, so I don’t recommend denim or old jeans unless you are only making one or two or have special denim super powers. Just plain old odds and ends of poly/cotton or cotton or muslin will work fine. (At first I hesitated to suggest fleece because I was afraid it might cause a little shock from static electricity during cold weather. I tried one out a couple of times and didn’t have a problem, so I think it’s ok after all. Fleece sews up easily too.) Feel free to alter as you like. The pillow I have is just a little bigger than the ones I made.
What you need:
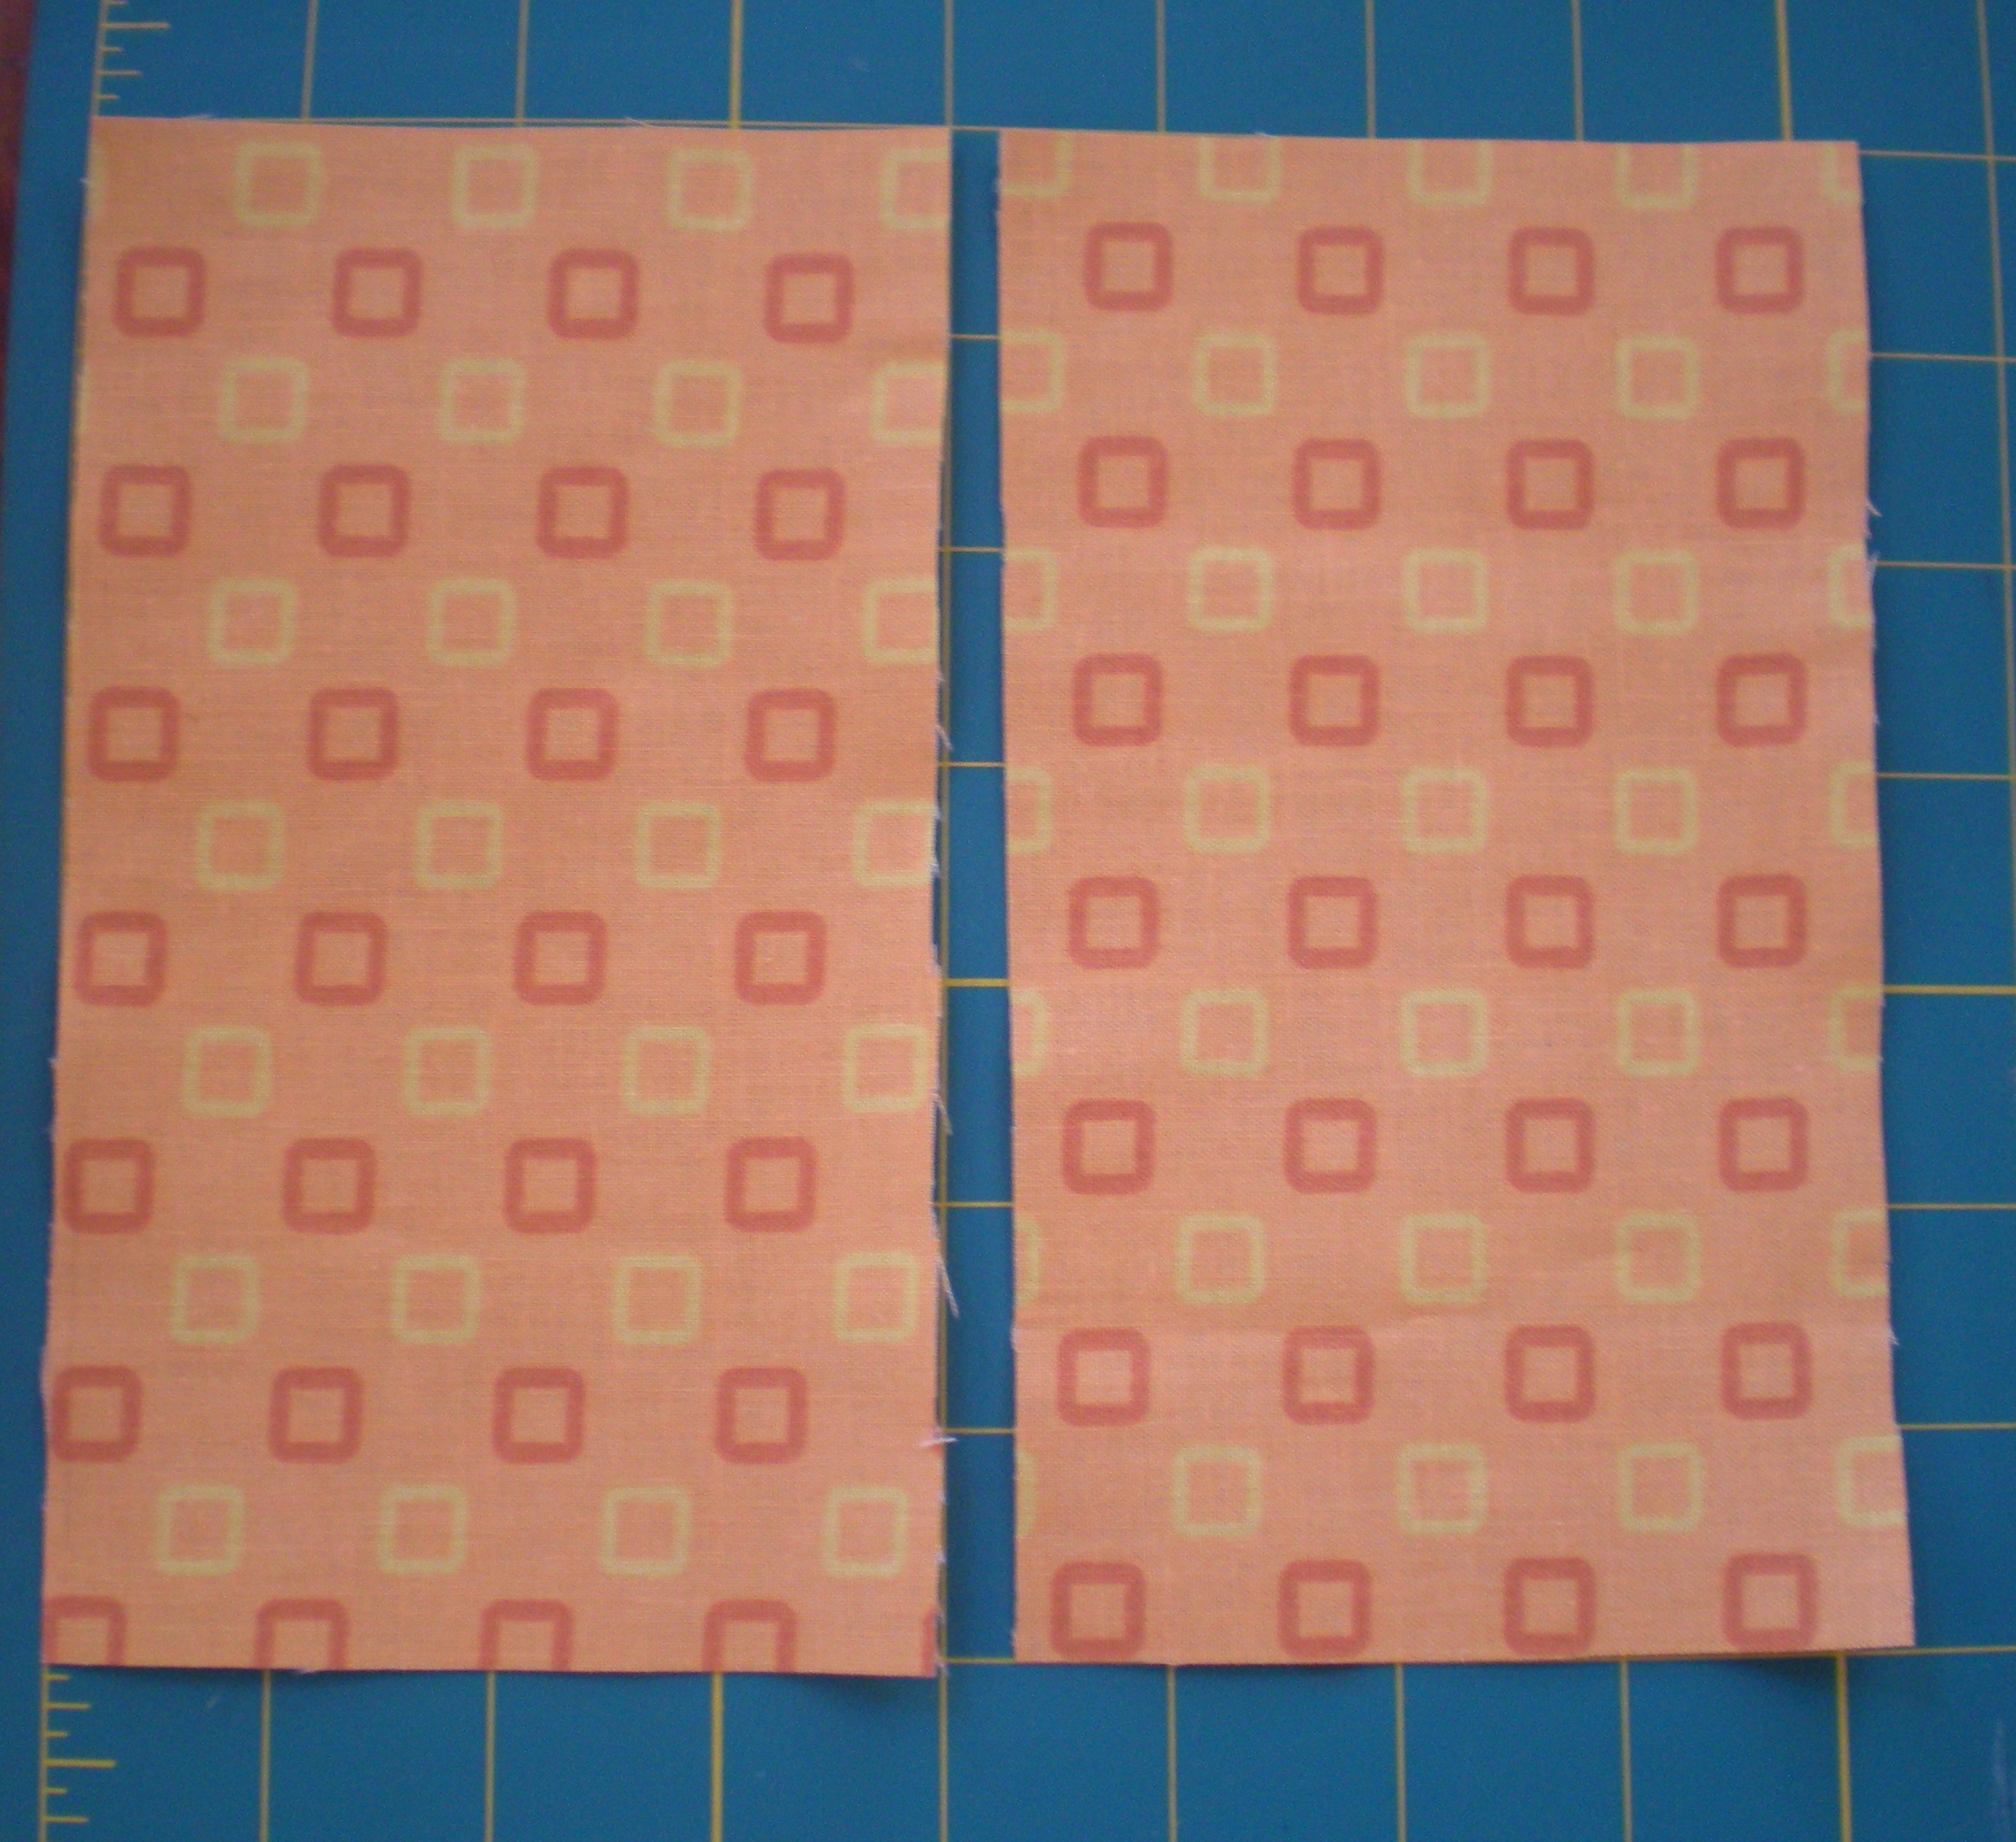
Enough fabric for two 7-x-4-inch rectangles.
Velcro – the sew-on kind, not with sticky backing. I used 5/8-inch width.
Fiber fill stuffing
thread
A word about velcro. One time I picked up several packages of velcro in a variety of colors and thought it was so great to have more color options. But – the velcro backing was very stiff and I didn’t really like it. I even cut rounded corners because I didn’t want it poking people. I don’t have a package to tell you a brand, but I bought it at Hobby Lobby. Last time I bought velcro I saw that some are labeled by how stiff or flexible they are.
Cut two 7-x-4-inch pieces of fabric.
Cut Velcro to 4-inch strip. (It has been suggested that a 3.5 inch strip is so much easier to sew. Duh!! And it should not cause a problem with snagging clothes because the little bit of velcro that will be exposed will be facing AWAY from clothes – not toward them.) Machine baste one side of Velcro to right side of fabric – fuzzy/loopy side up. Stitch only one end of Velcro, leaving the other end free.
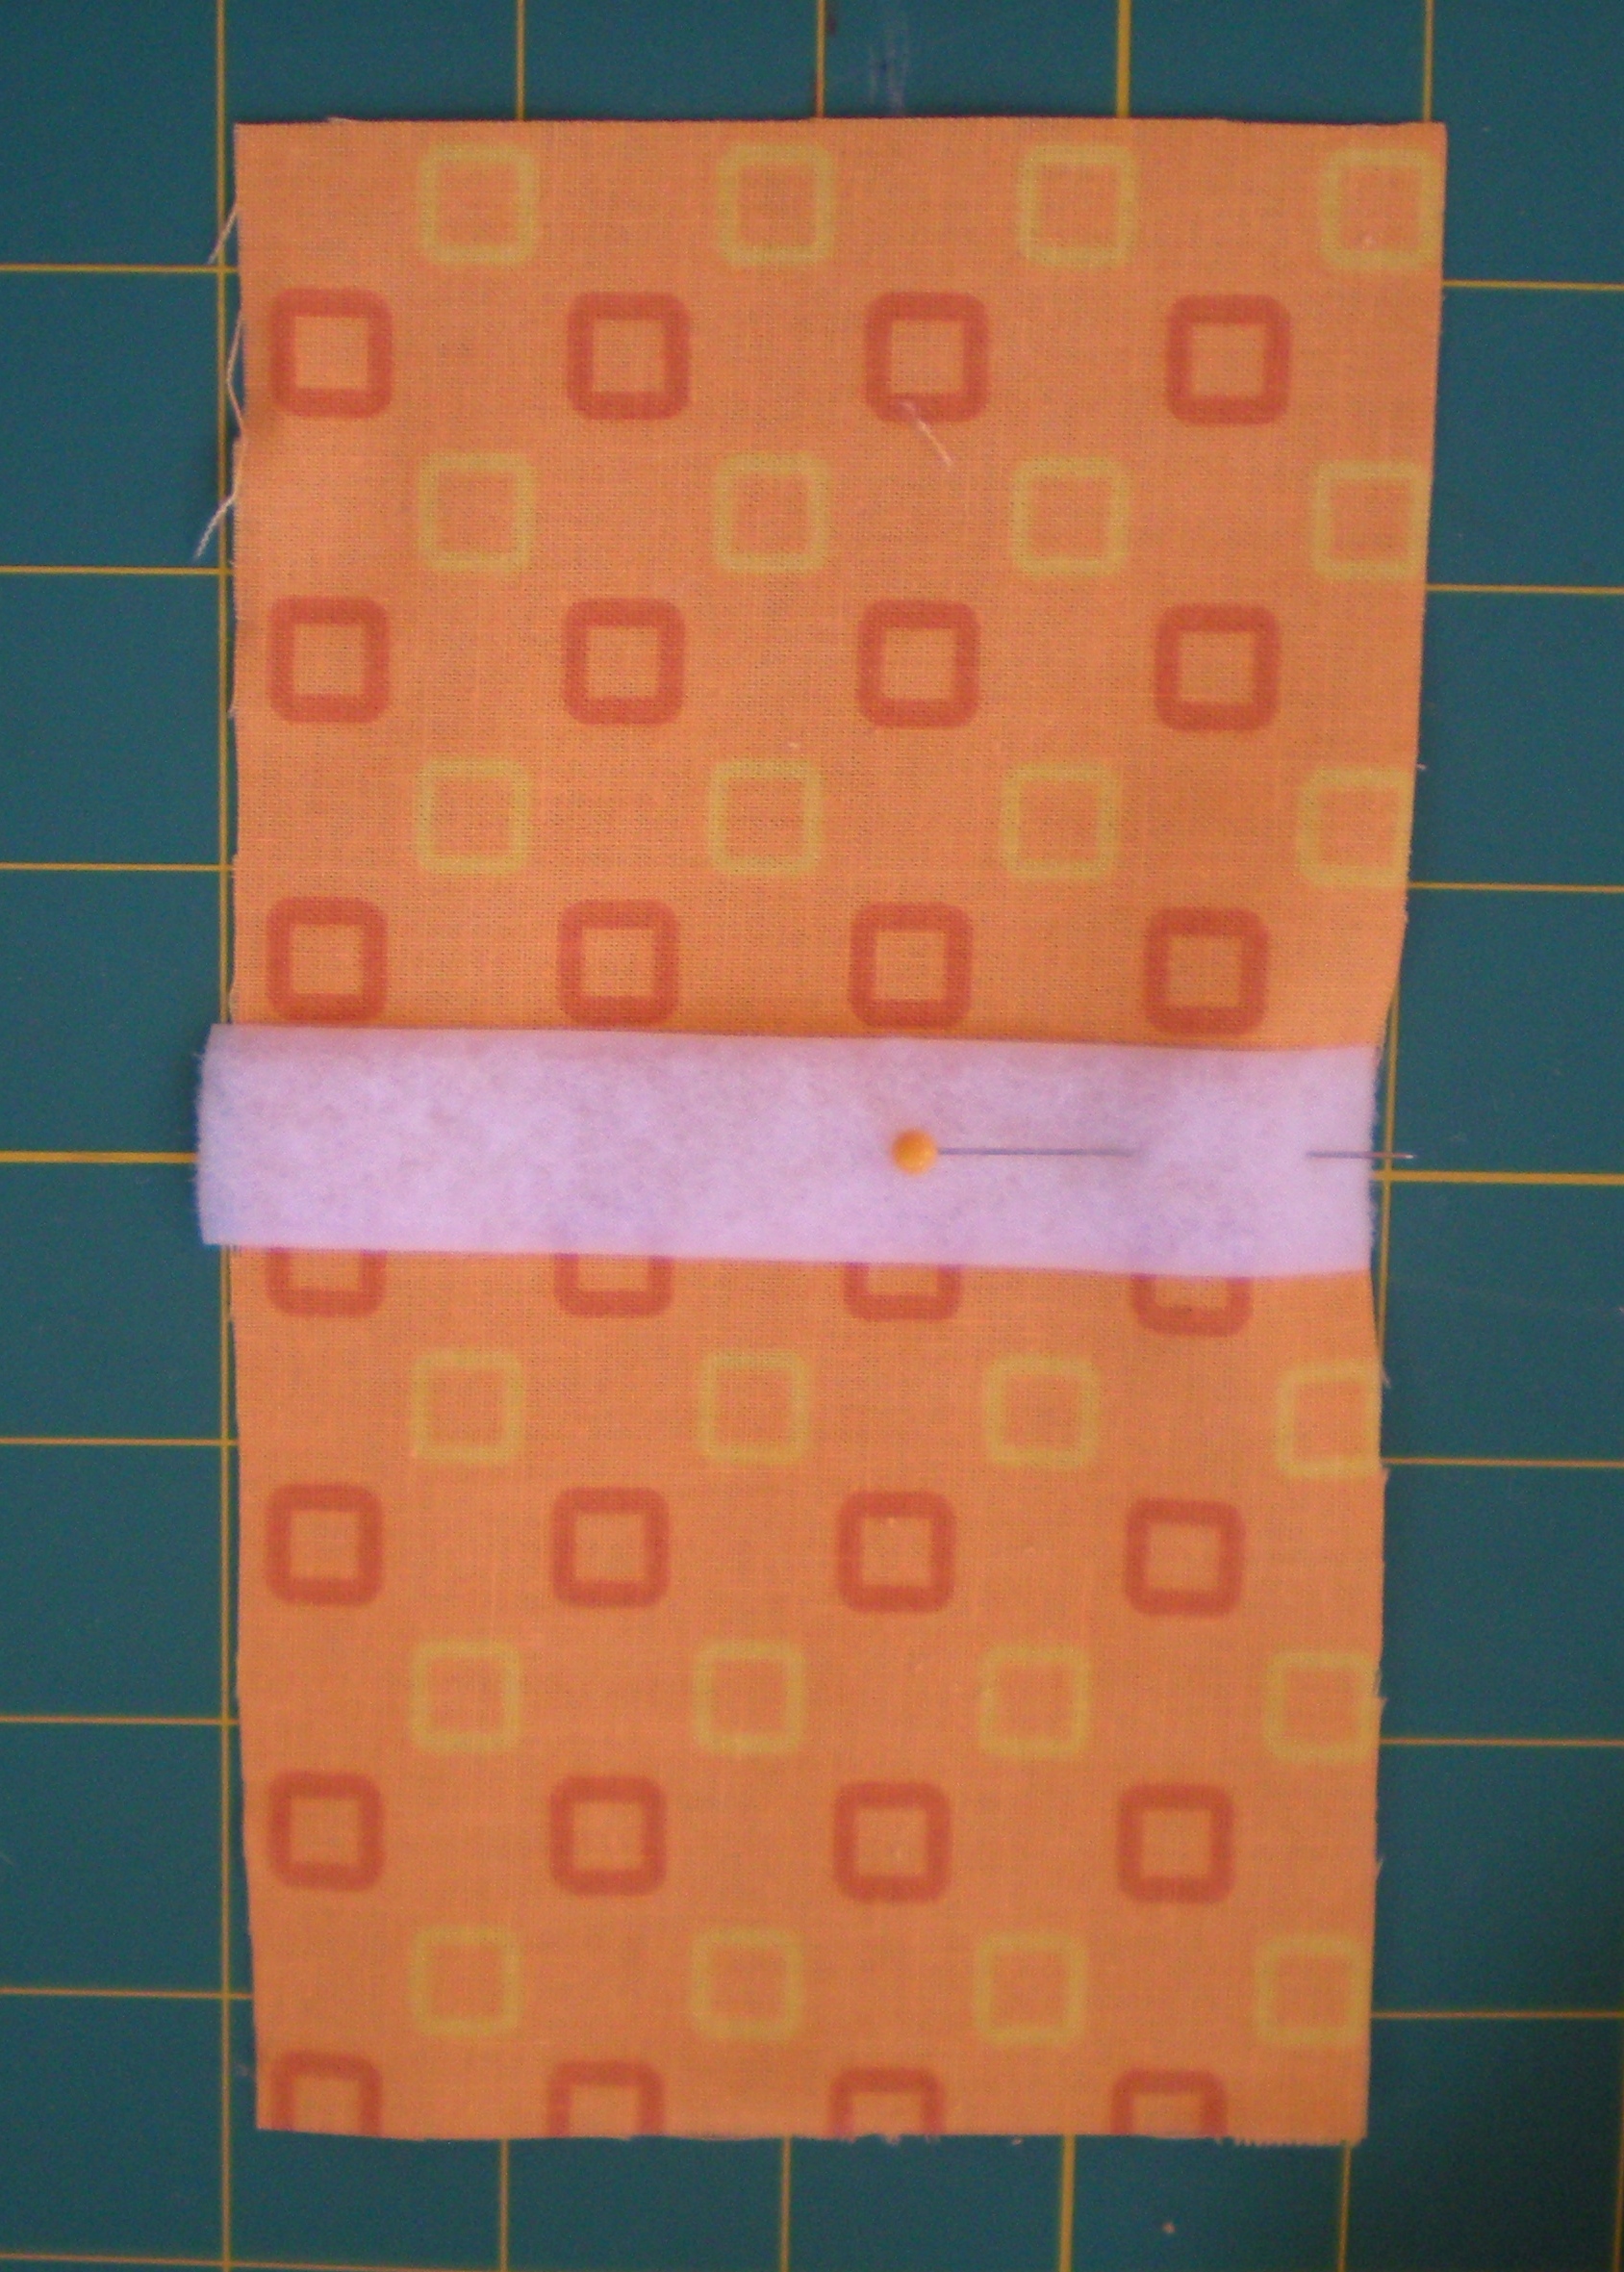
Baste other half of Velcro strip to opposite side of fabric – loopy side down.
 Put fabric pieces right sides together and make 1/4-inch seam all the way around, leaving an opening about 1 1/2 – 2 inches at one end. Be sure not to catch the “free” ends of the Velcro pieces in the seam. (See above. If you cut your pieces to 3.5, you won’t have to worry about catching the free end.)
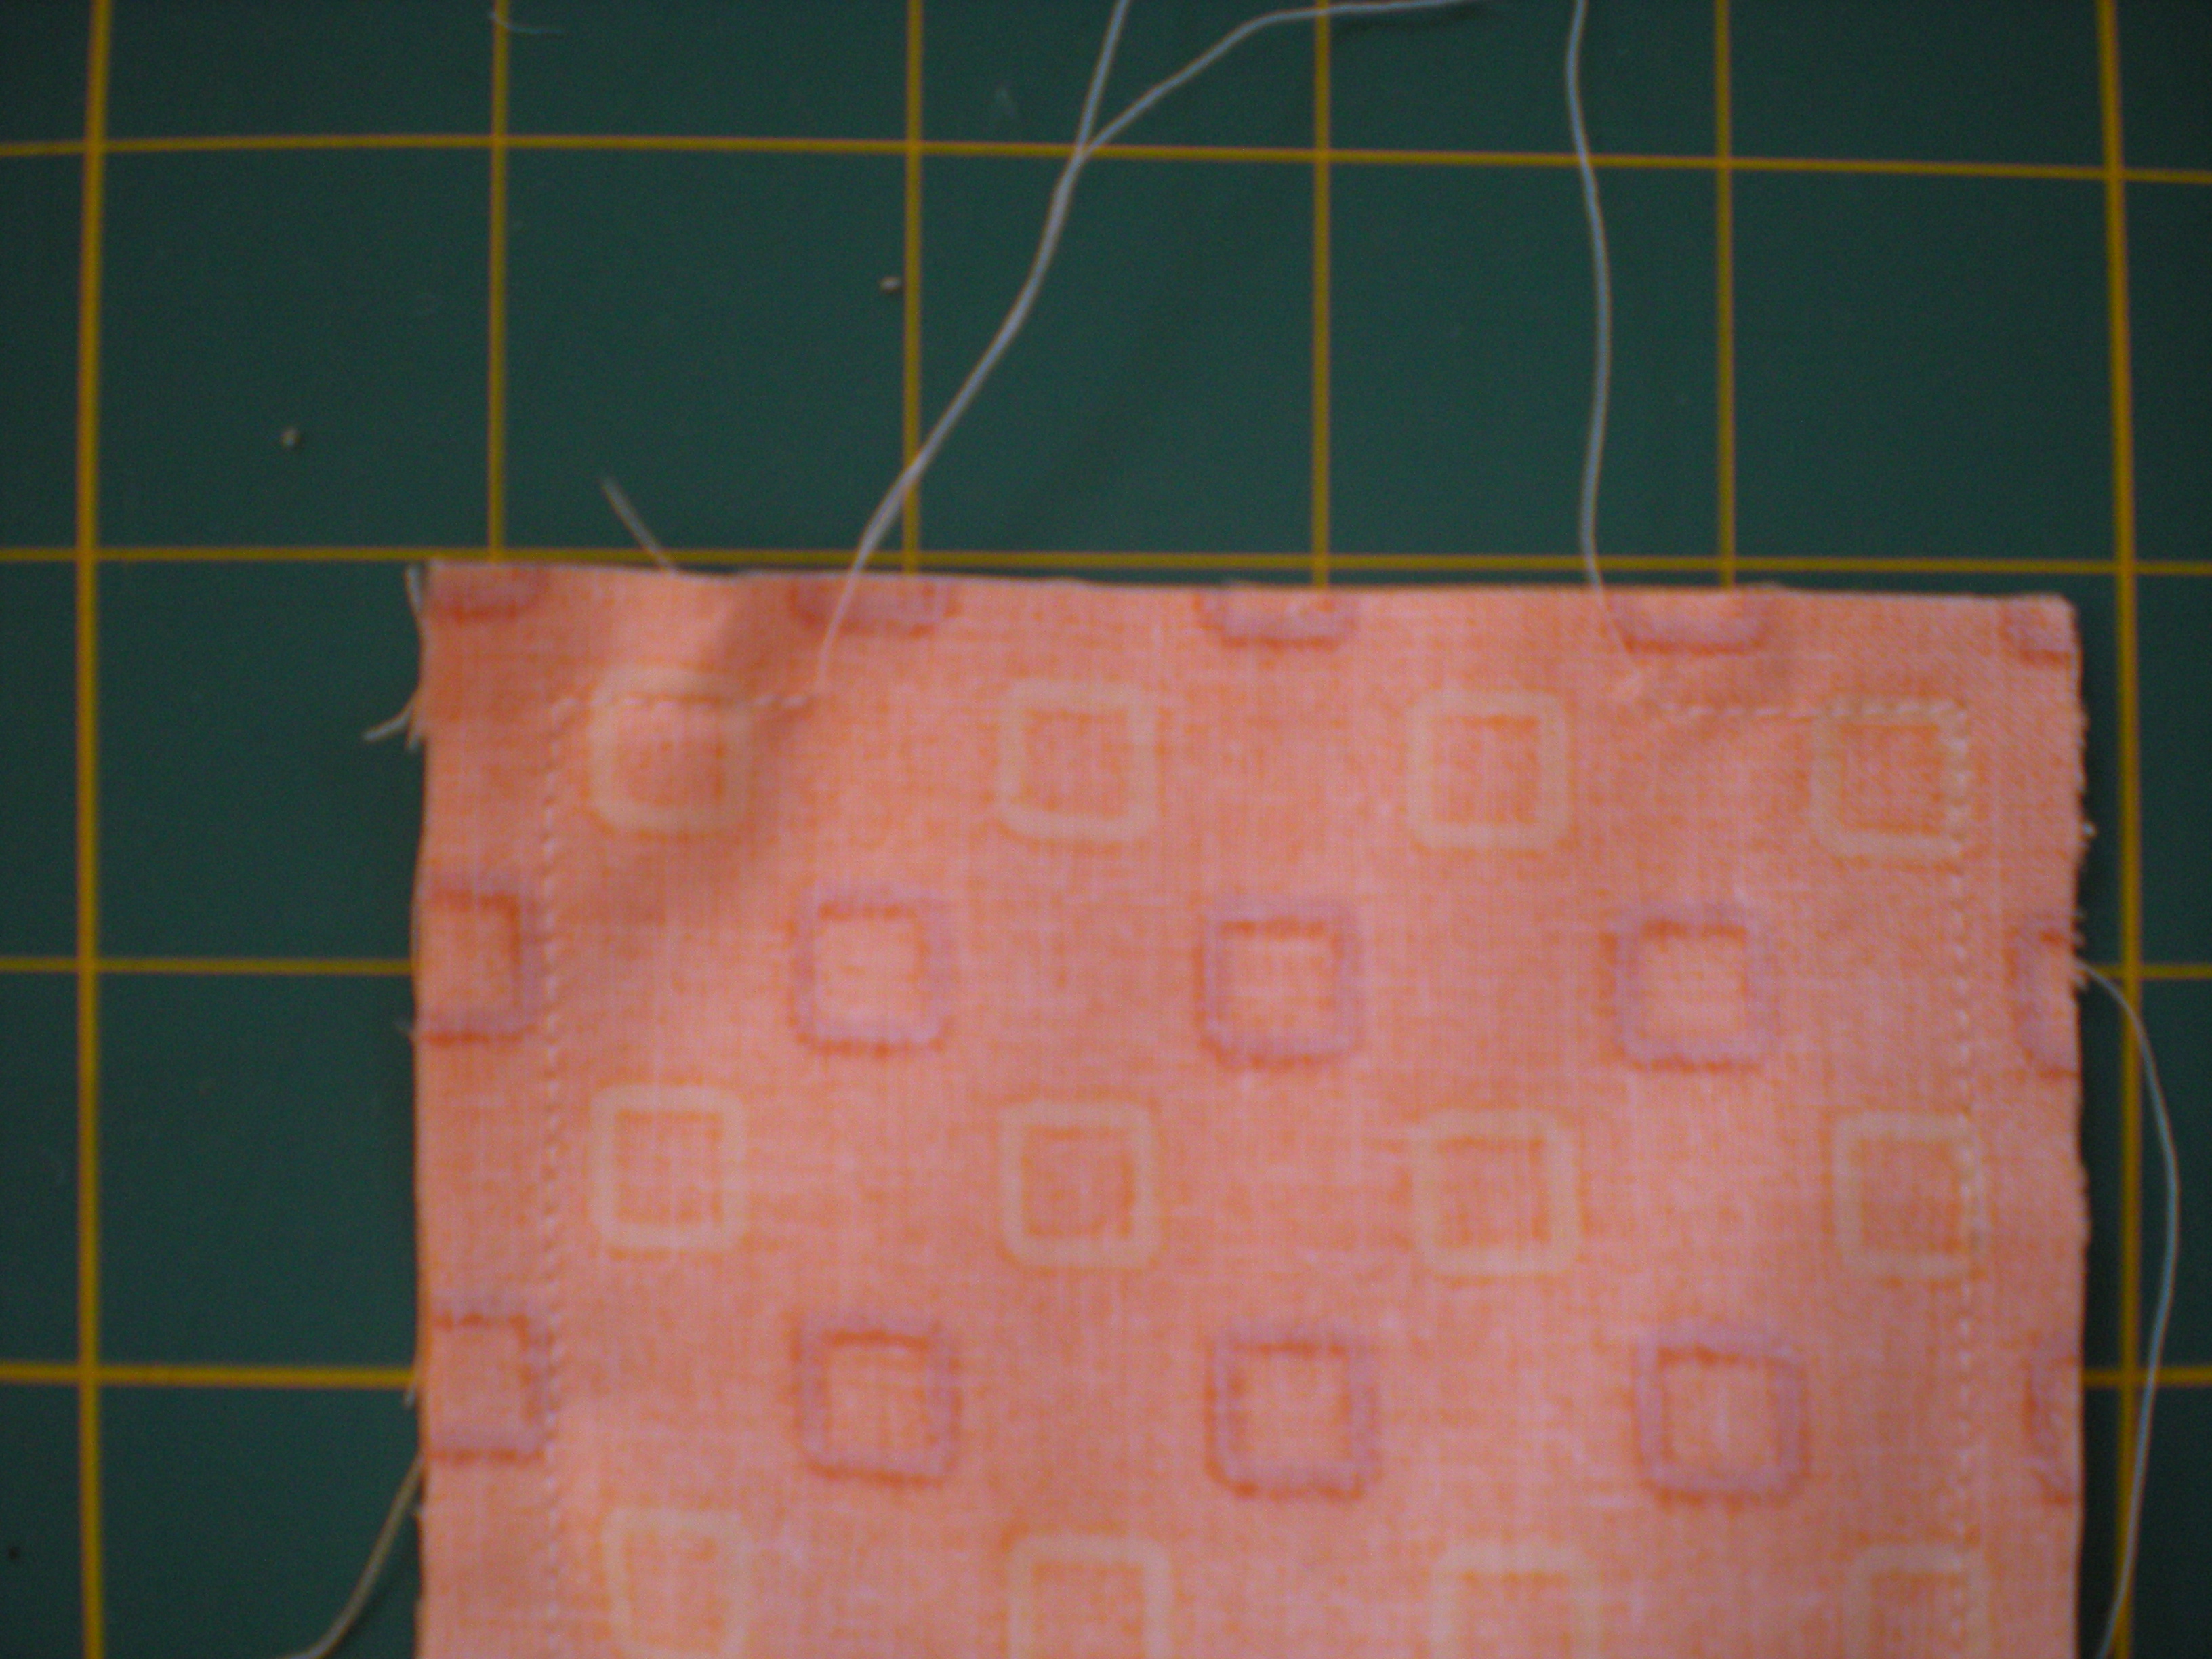 Turn right side out and stuff.
 Whip stitch opening to finish. Ta Da!

These are great to do assembly-line style, if you want to make more than one or two.
I look forward to celebrating many more 12ths of the month and practicing this small act of gratitude.
And if you are the praying kind, join me today in offering a prayer of thanks for doctors, nurses, researchers and modern medicine, and for those receiving treatment today and those caring for them.